
How to Build a Personal Blog or Résumé Site Without Code
Author: Thinker
Reviewer: I
Would you like a blog or résumé site of your own? A personal corner of the internet gives you room to experiment and build something that is entirely yours. This guide shows complete beginners how to set one up quickly and easily, without writing code.
Create a GitHub account
GitHub is an open-source code-hosting platform where people share and manage projects. If you do not have an account yet, follow the steps below. Otherwise, skip to the next section.
How do I sign up for GitHub?
- Open the GitHub website
Open a browser and go to https://github.com/. - Complete the registration form
On the GitHub home page, click “Sign up” in the upper-right corner. Enter a username, an email address, and a password. Use a valid email address because GitHub will ask you to verify it. When the form is complete, click “Create an account.” - Verify your email address
GitHub will send a verification message to the address you entered. Open the message and click “Verify email address” to complete your registration.
Choose a template project
If you are not sure what a personal blog or résumé site might look like, start with one of these two common templates:
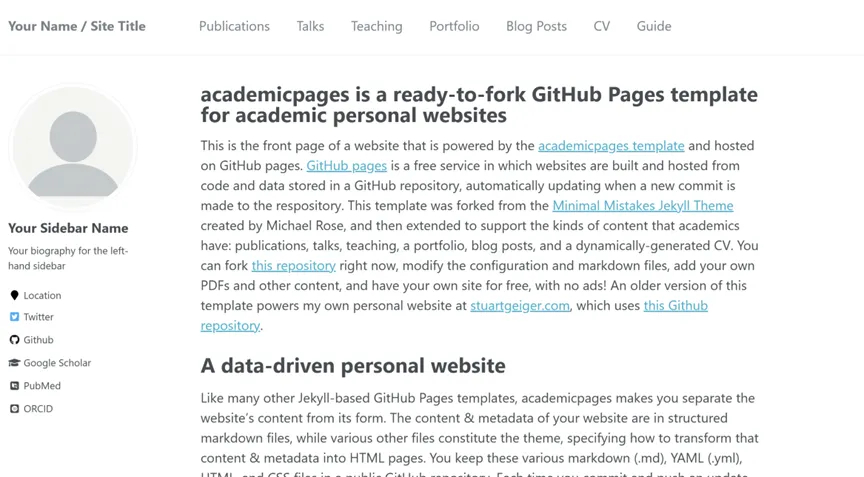
- Personal academic résumé:
https://github.com/academicpages/academicpages.github.io
The static site looks like this:
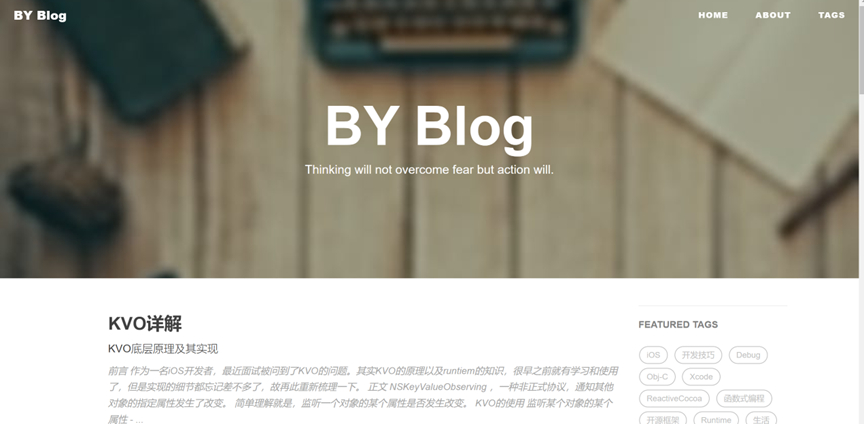
- Blog:
https://github.com/klovien/klovien.github.io
The static site looks like this:
Create your personal website
Open the project you chose in the previous section. In the academic résumé example, the “Fork” button appears in the upper-right corner of the project page:
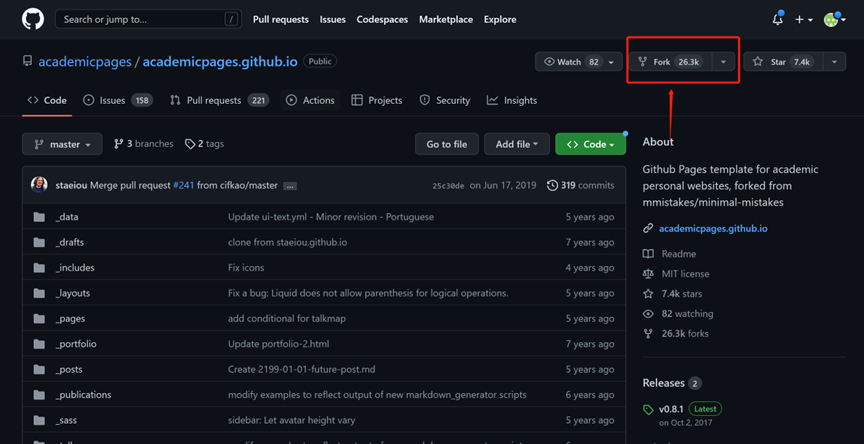
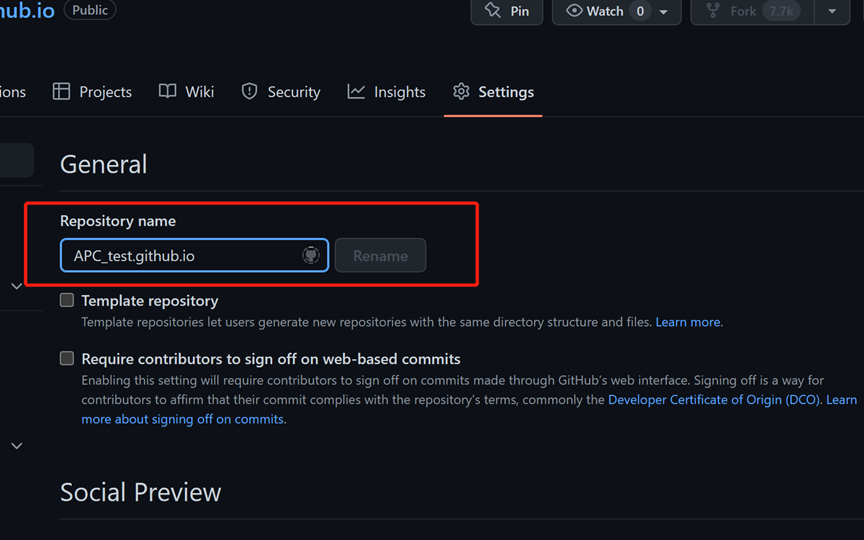
Click Fork, then open the repository that GitHub creates under your account. In its settings, rename the repository to yourusername.github.io, replacing yourusername with your GitHub username.
Note: Keep .github.io exactly as written. Replace only yourusername.
Customize the site
Enter yourusername.github.io in a browser, again replacing yourusername with your GitHub username, to open the site. For the academic résumé template, the README explains how to customize it:
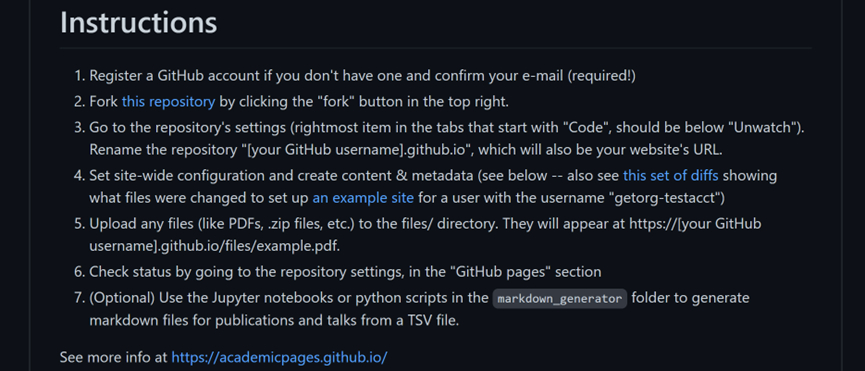
The instructions look like this:
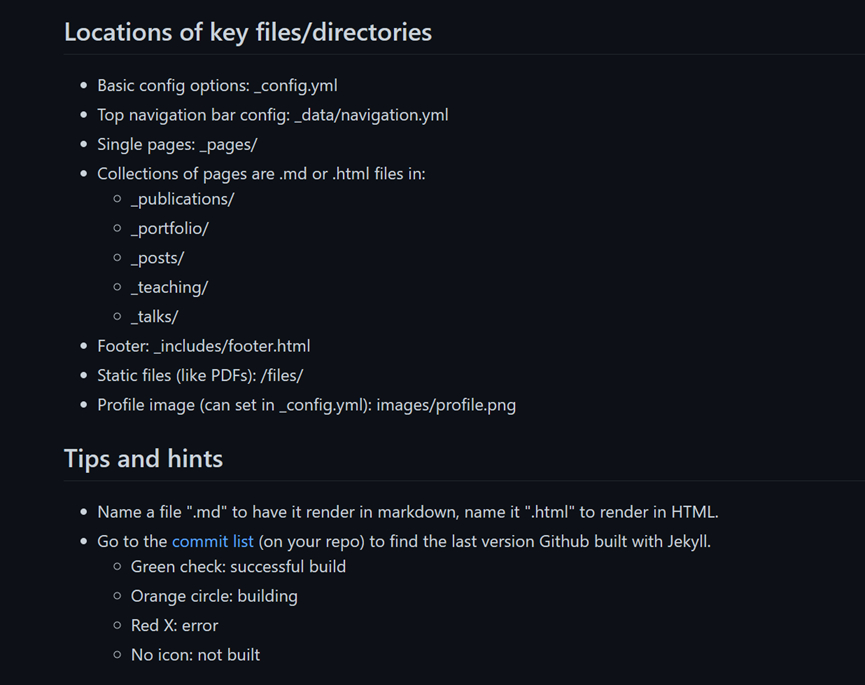
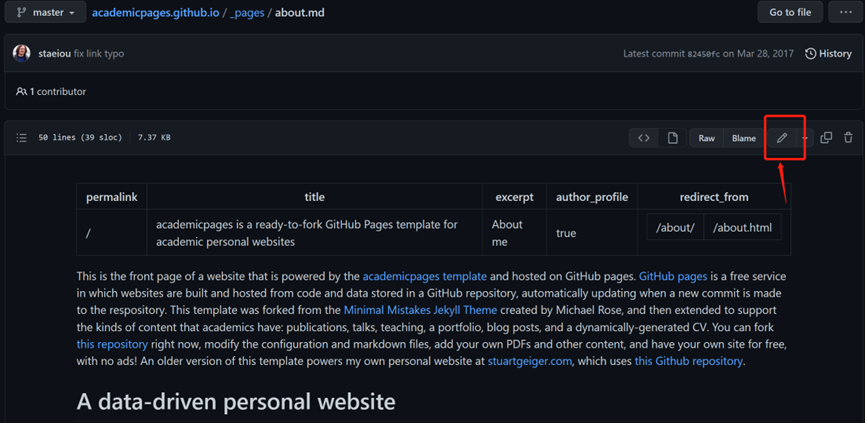
To change a page, open its corresponding file in the repository and click the edit button:
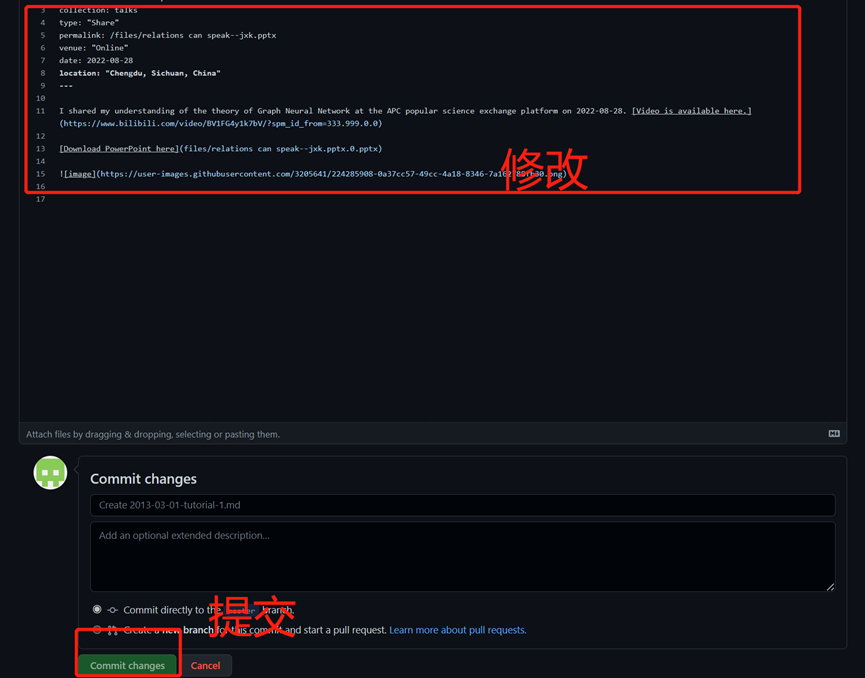
Once you have edited the page, click Commit to save the change. Give the site a little time to deploy, then reload it in your browser. The new content should appear.
You can also upload files of your own, including PDFs and images; the README explains how. From there, explore the template and learn how its styles work. With a little experimentation, you will have an academic résumé site of your own.
Can I use a domain name of my own?
Yes, but you would need to buy the domain. Because that option is not free, this article does not cover it.
 爱发电(点击图片跳转)